3 Reasons We Make Felt Toys for Playgroup (Pssst One’s for Us!)
1. They Support Tactile Learning
Felt is soft, textured, and easy for small fingers to grasp. It provides just enough resistance to help babies and toddlers strengthen fine motor skills as they pinch, press, and stack. The variety of textures found in wool felt also stimulates the sense of touch, helping little ones learn to explore through their hands. Sensory play with felt can calm busy minds, invite curiosity, and build the foundation for future skills like writing and coordination.
2. They’re Eco-Friendly
Our felt toys are made from natural wool or recycled materials, which means they’re kind to the earth and free from the harsh chemicals often found in plastic toys. When they’re no longer needed, they break down gently. Choosing felt is one of the many ways we reduce our footprint while still encouraging imaginative, open-ended play.
3. Creating them is Therapeutic!!
Don’t get me wrong, I spent most nights aimlessly scrolling through my phone (and thoroughly enjoying it), but I find I actually decompress best doing something simple and therapeutic, like crafting these little guys. What’s even better is having something at the end to share with a little one and see them light up!
The process can also be inclusive! Let your little one choose colours, sort scraps or add the filling. My 4-year-old loves to sit beside me and cut scraps up with kid-safe scissors, while my 2-year-old picks up the pieces and calls out the shapes. It’s a sweet, inclusive way to involve kids in the creative process - one that builds confidence, connection, and imagination.
Here’s an easy idea to try this out…
Make Your Own Felt Heart Toy
What you’ll need:
• Wool felt in your chosen colours
• Scissors
• Needle and thread
• Toy stuffing (wool roving, fabric scraps, or natural filling)
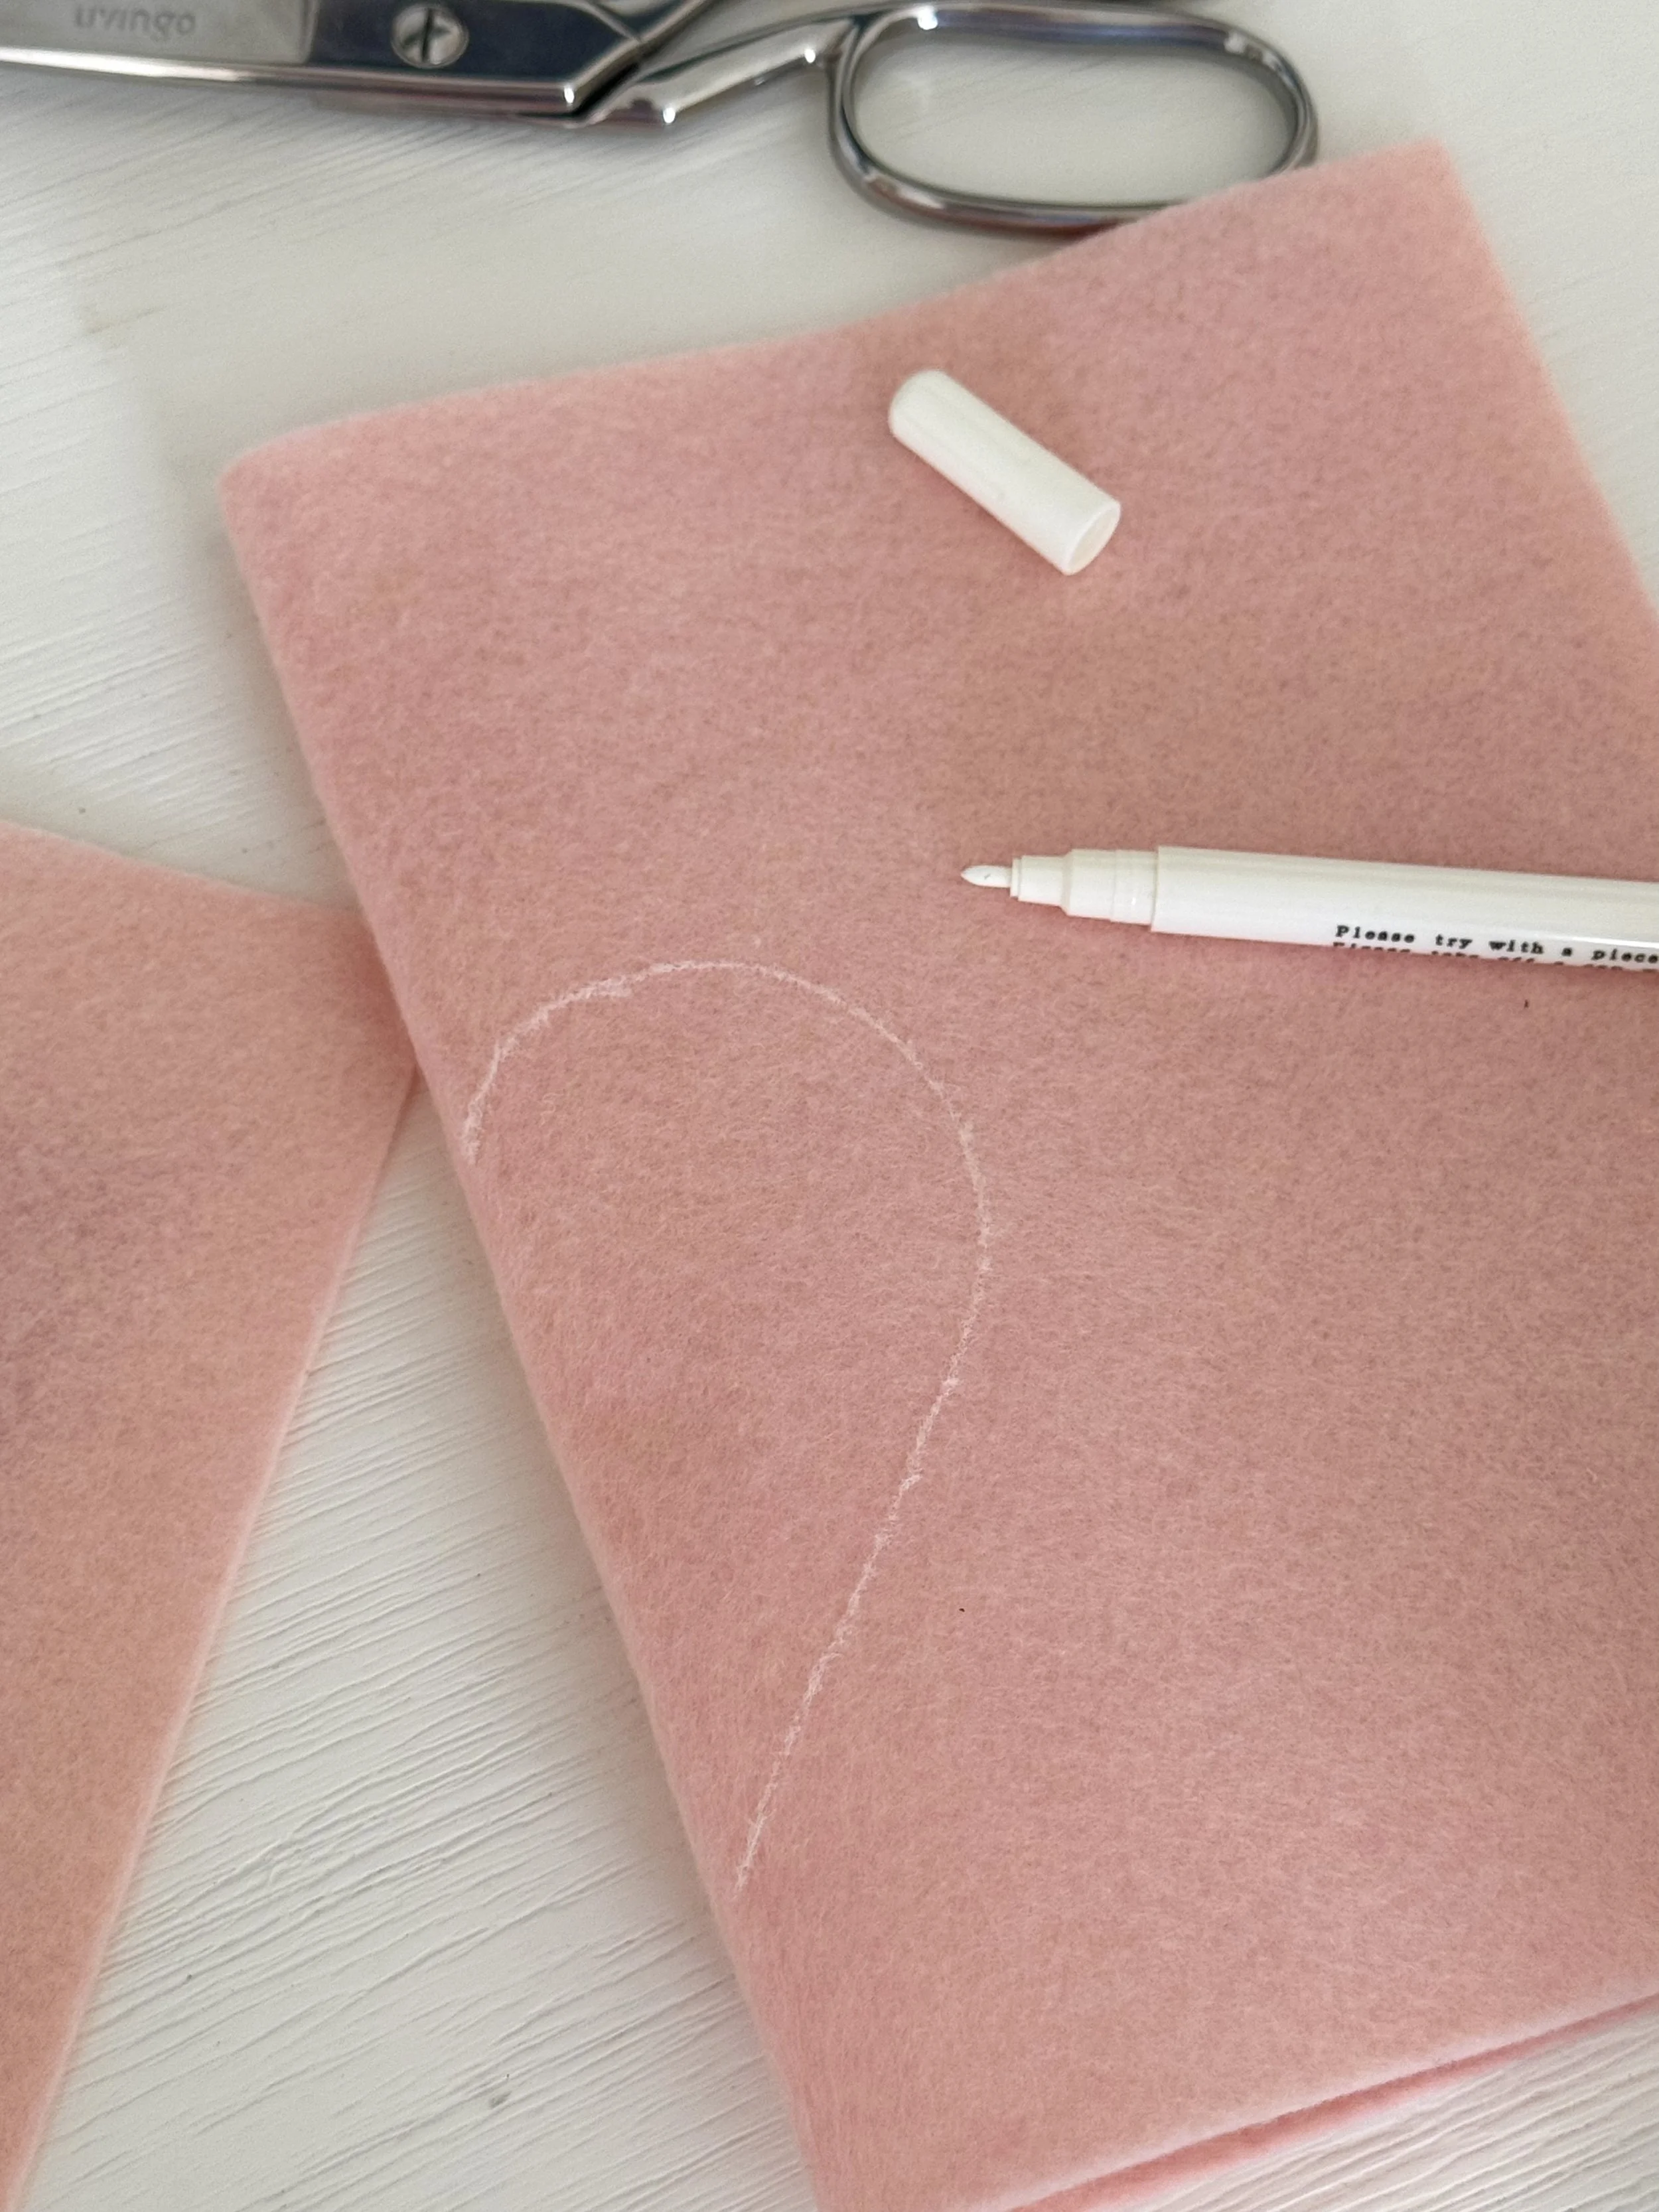
• Chalk or pencil for tracing
Instructions:
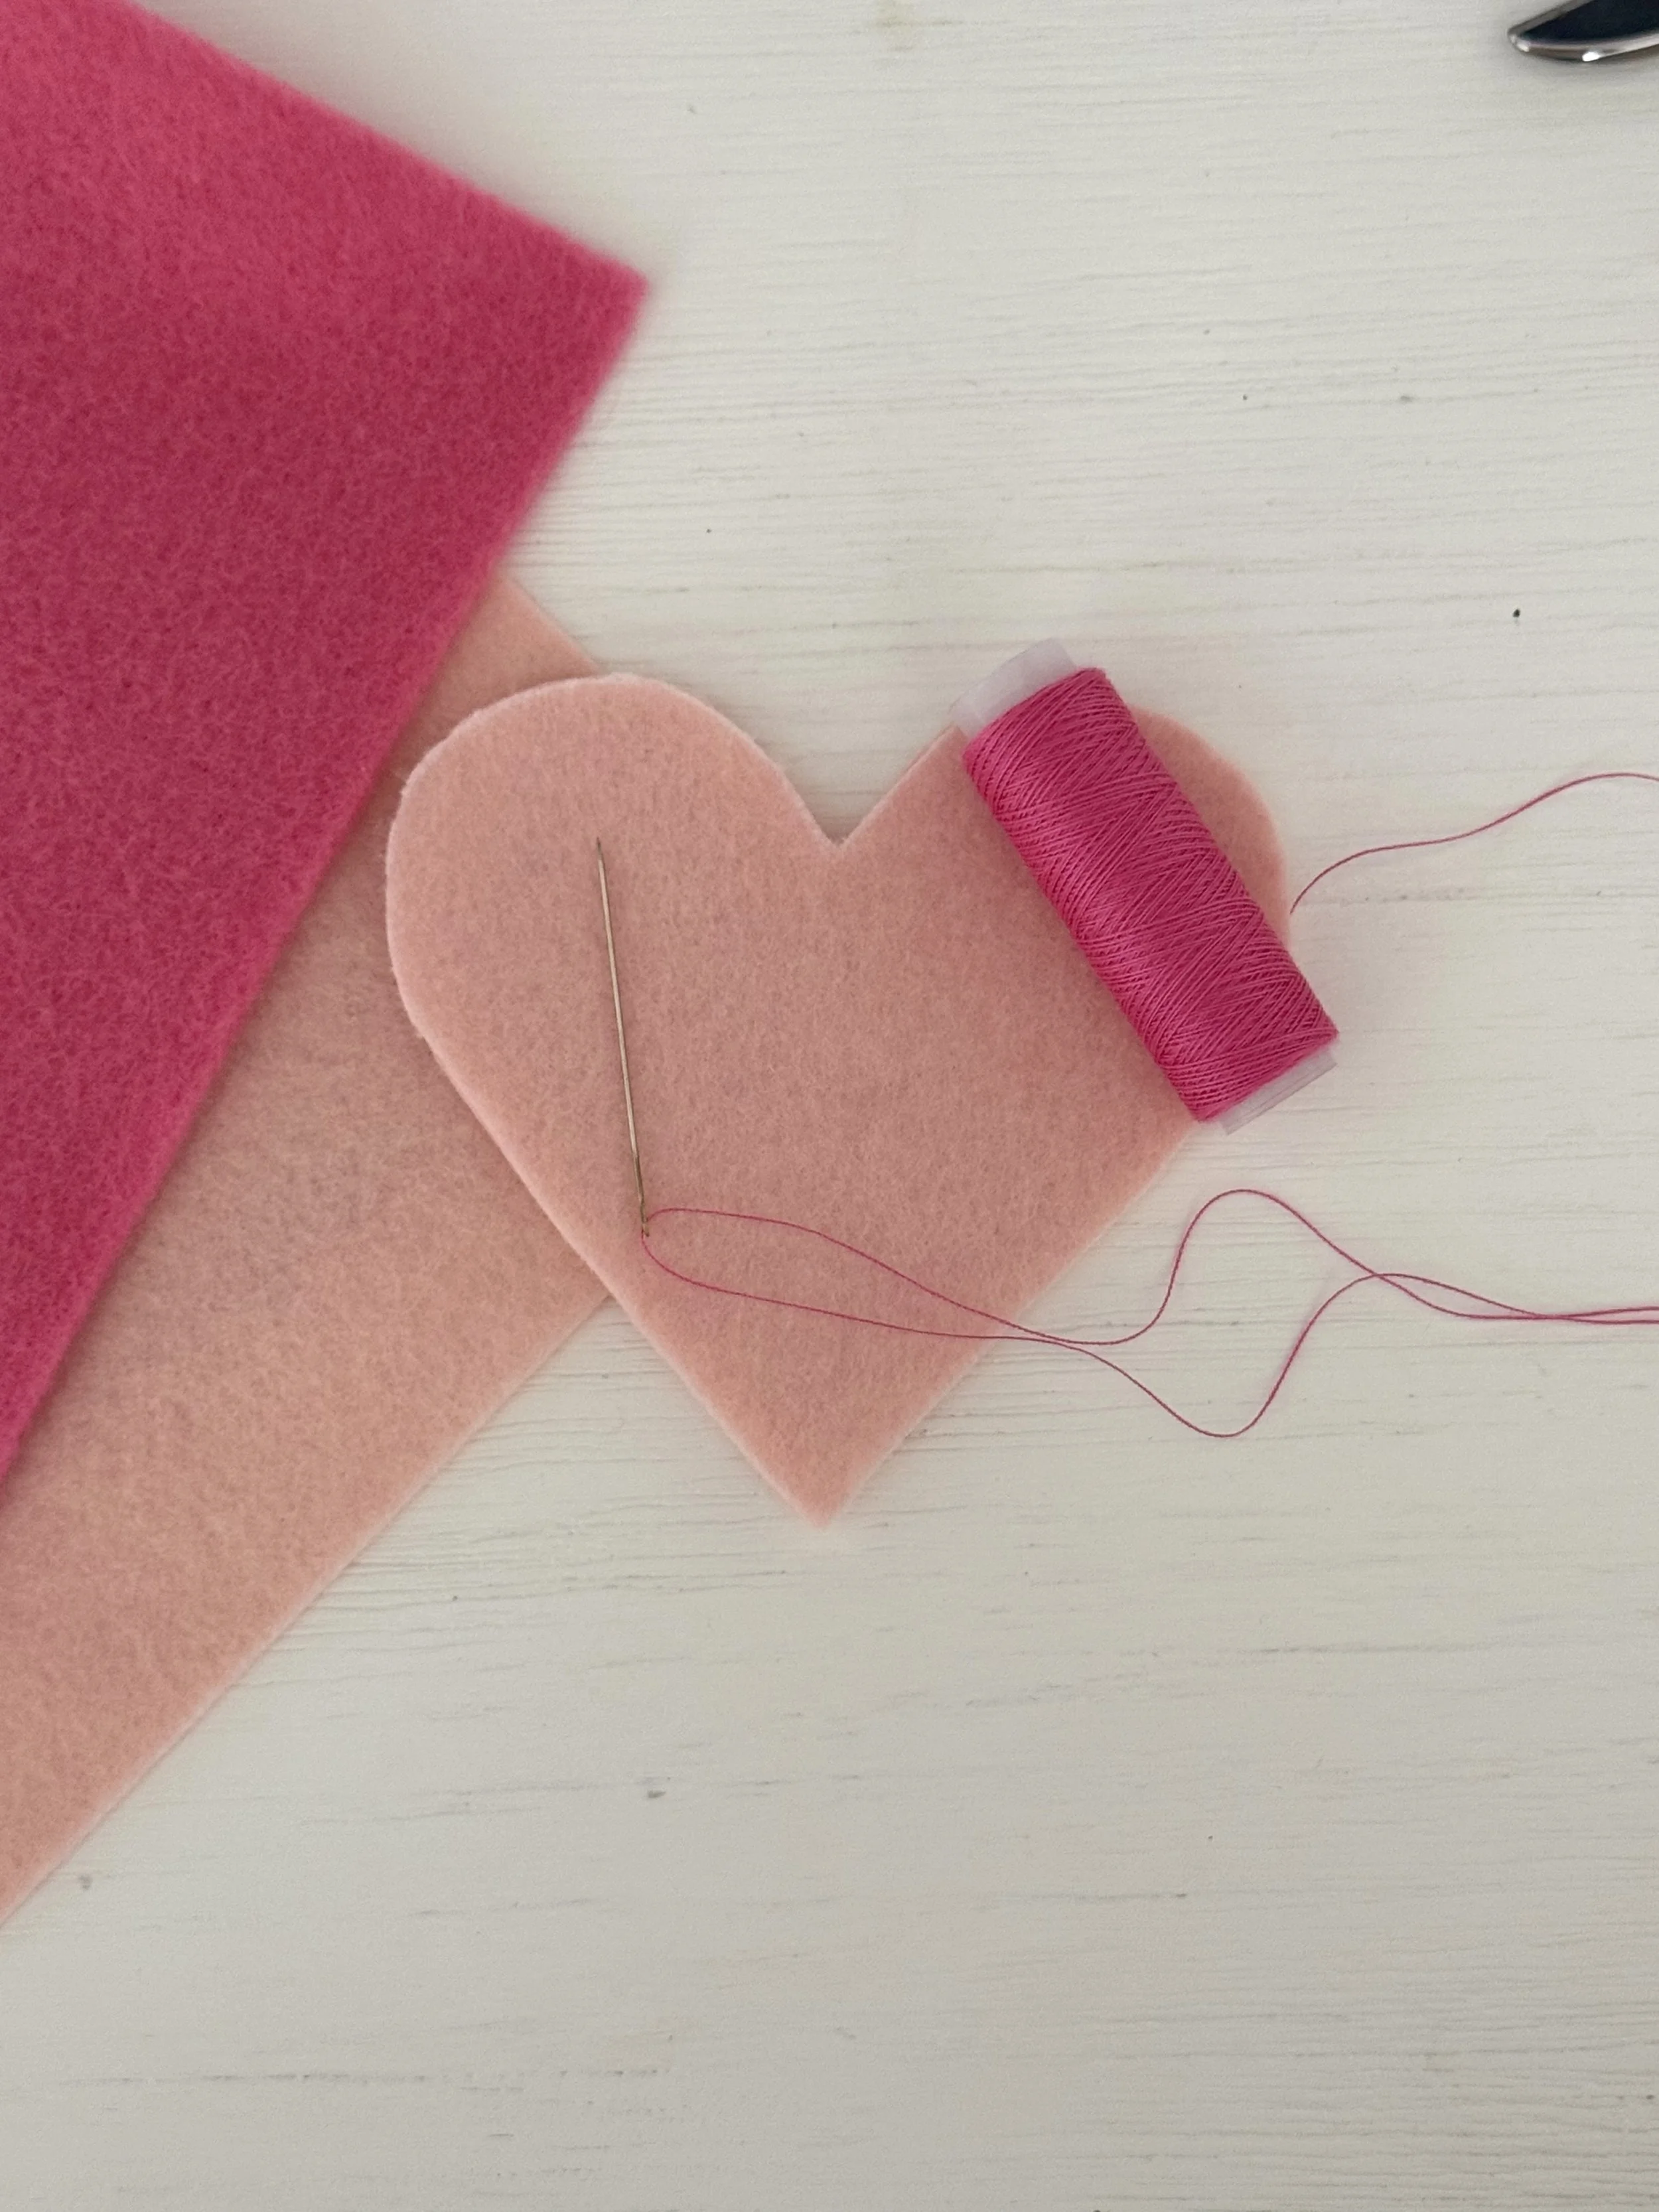
1. Cut Two Heart Shapes
Use your template or draw a heart onto your felt. Cut out two matching heart shapes.
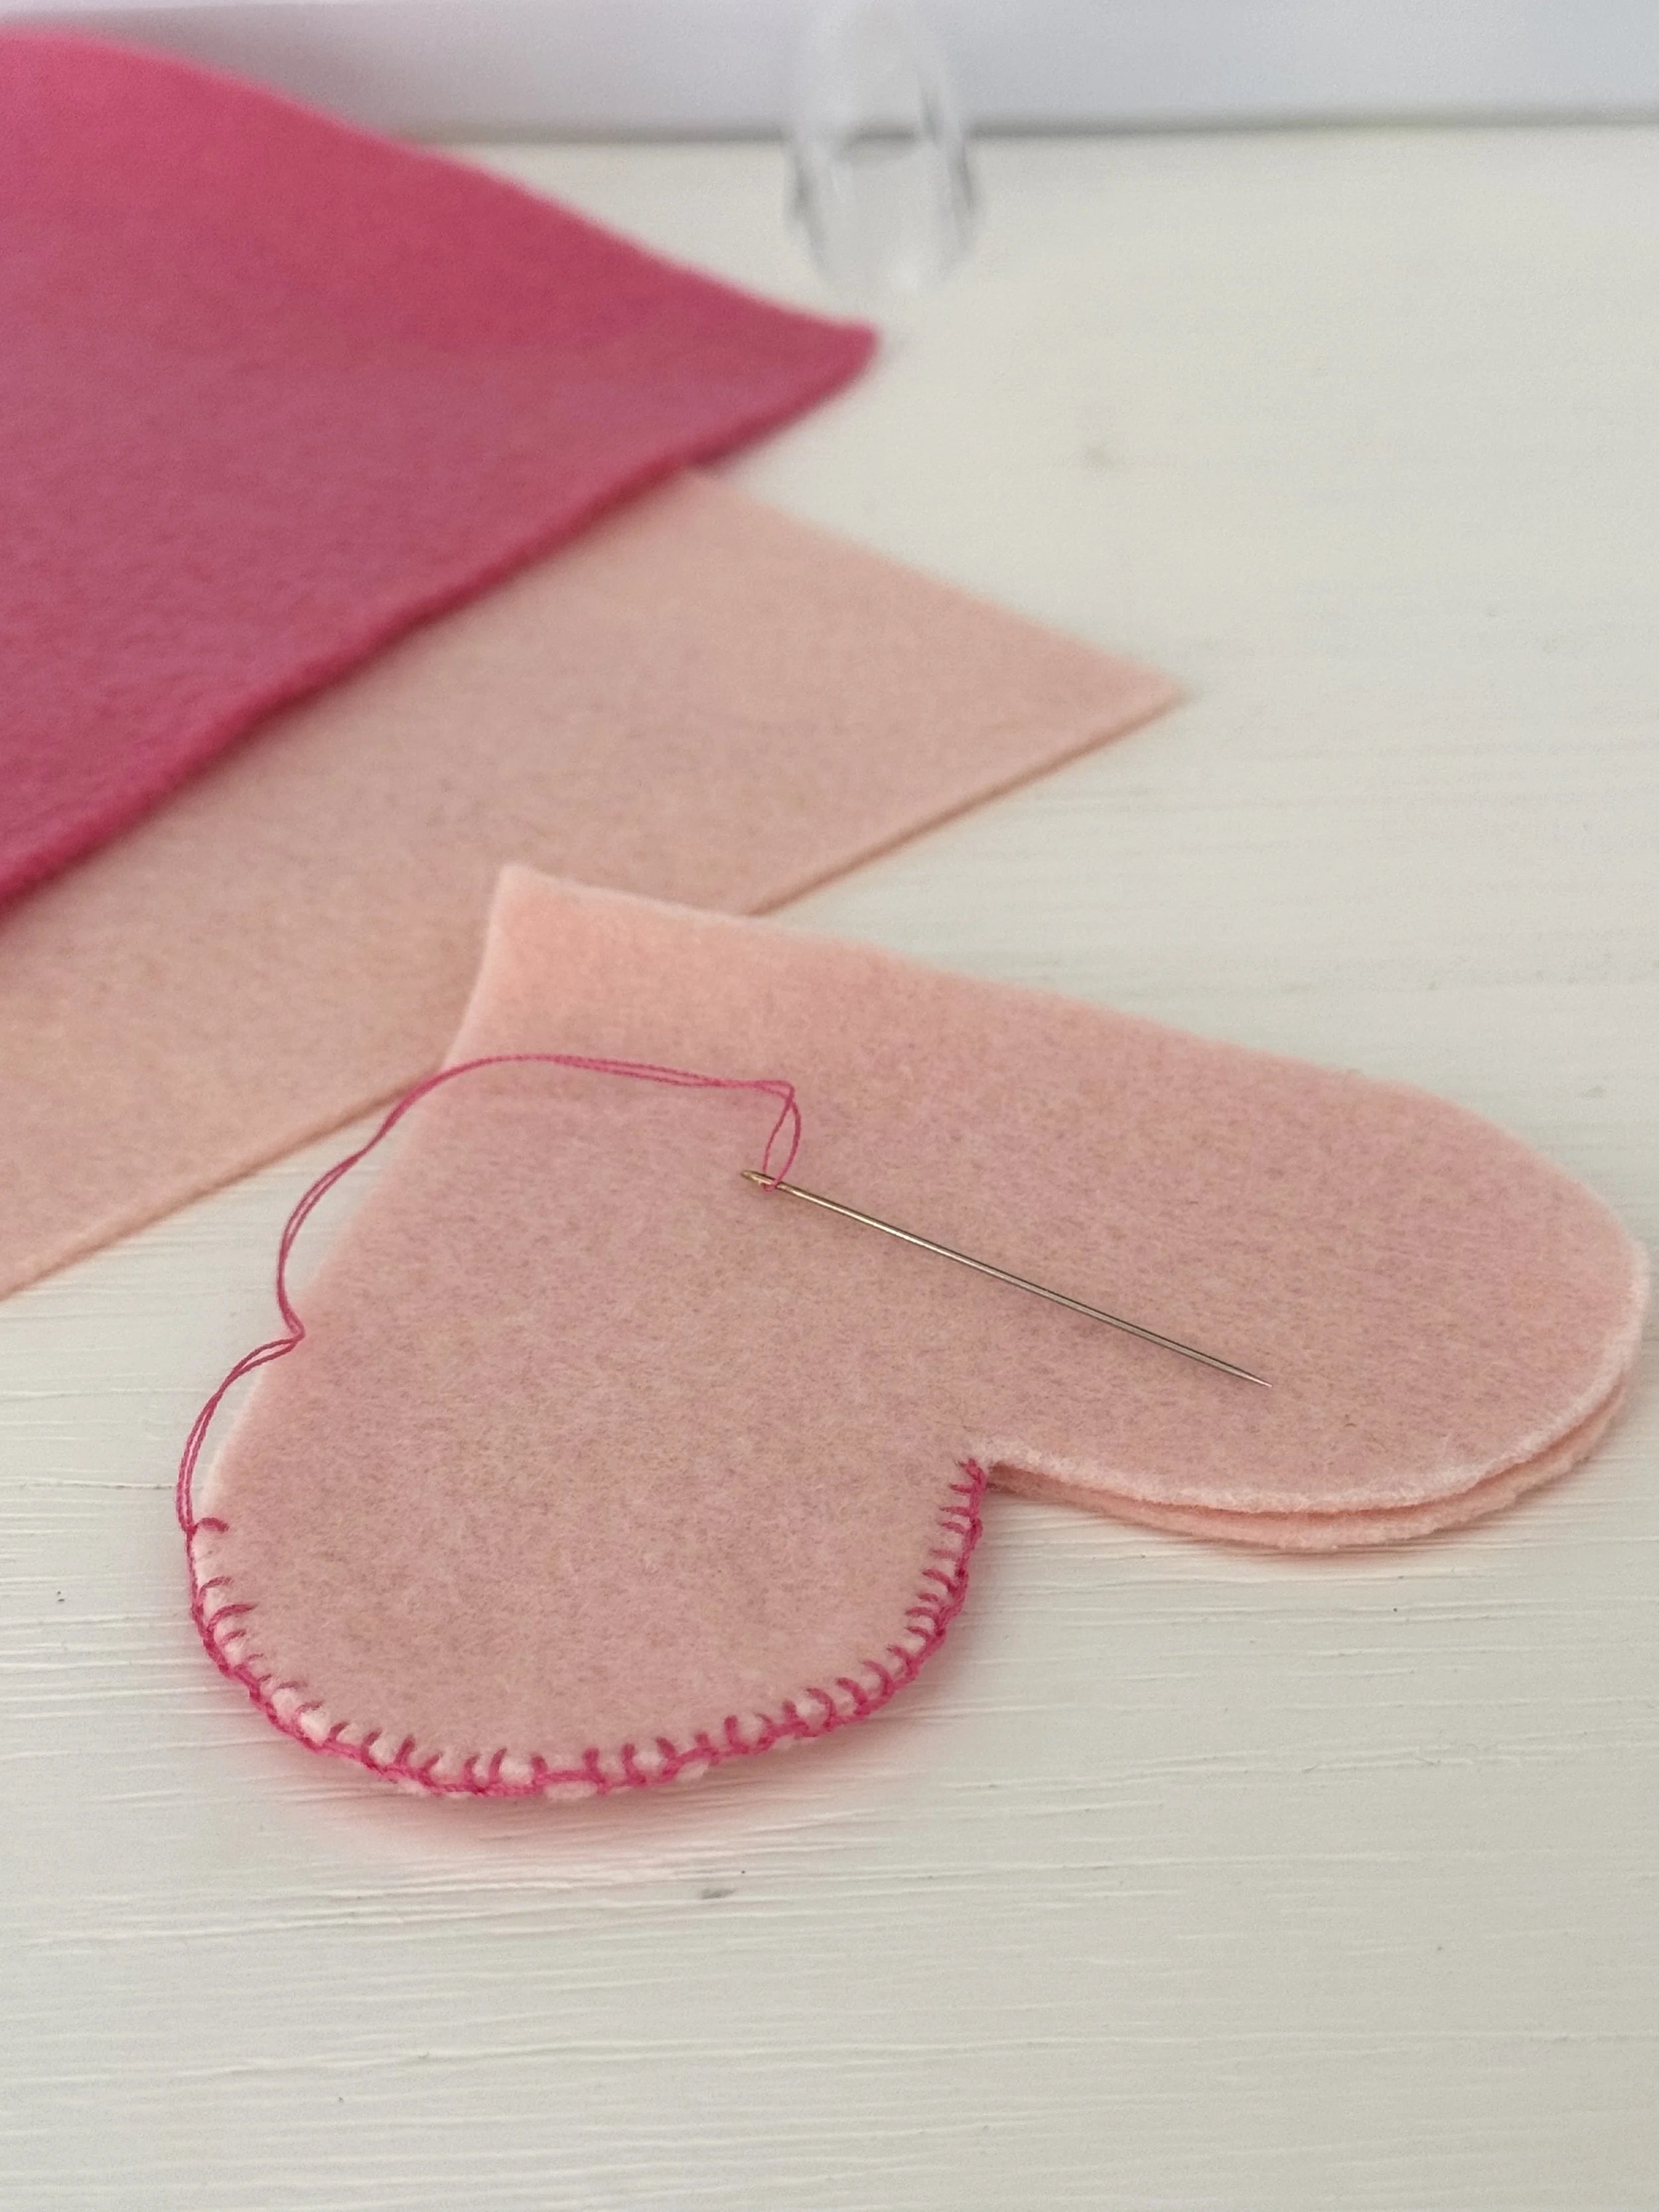
2. Sew the Edges Using the Whip-Stitch
Place the two hearts together, and start sewing around the edge with a simple running whip-stitch. Leave a small opening (about 2–3 cm).
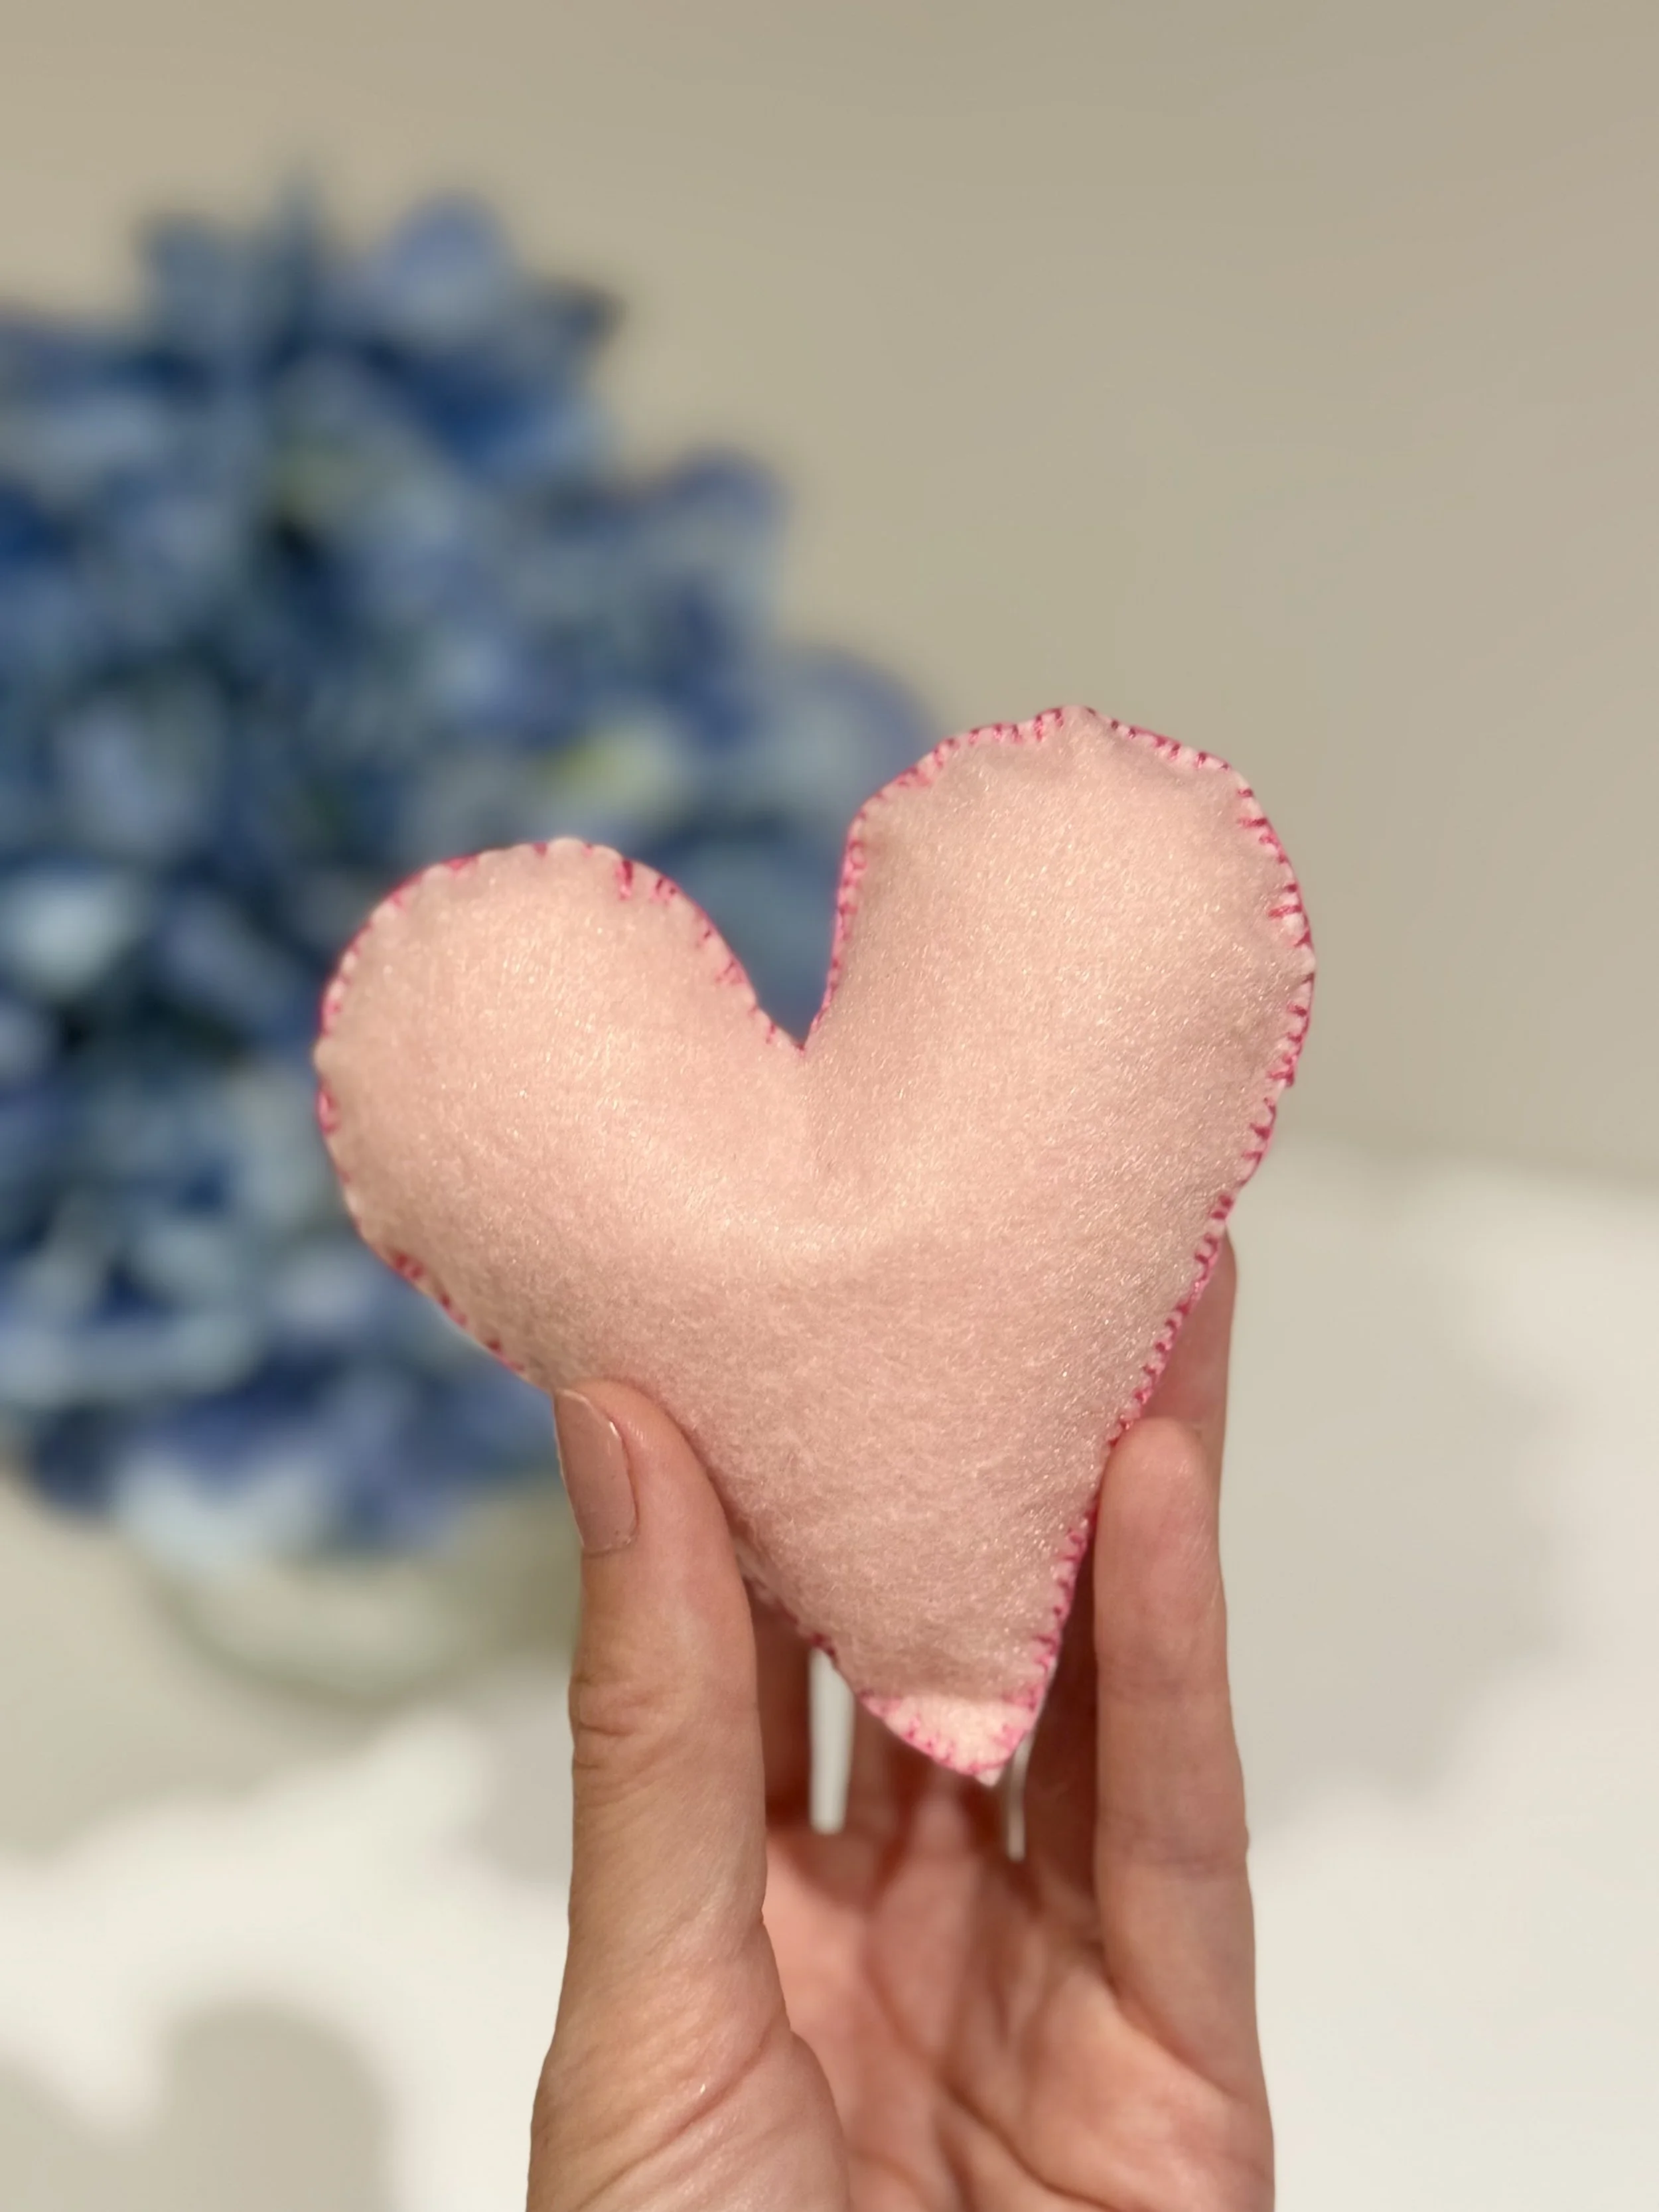
3. Add the Filling
Gently stuff your heart with wool roving, soft felt scraps, or another natural filling. Don’t overfill—it should stay soft and squishy for sensory play.
4. Close It Up
Sew the gap shut.
5. Play!
Child-Friendly Tips:
• Let little ones choose the colours, pass you pieces to sew, or help put the filling inside.
• Older children can even try stitching with a blunt needle and thick thread or yarn.
• Use heart scraps to practice sorting by colour, shape, or size.
This small project is full of love and a perfect introduction to handcrafts for families. If you give it a try, tag us so we can see what you’ve created! Remember, it’s not about perfection, it’s about PLAYING!